Installing the printhead
You may need to install a new printhead when the existing printhead is producing poor print quality.
- Tap Settings.

- Scroll down and tap .
- Tap Install Printhead.
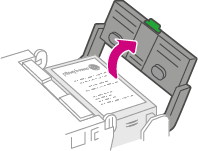
- Lift the cover. The ink cartridge moves to the front position.
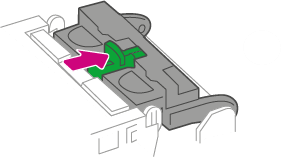
- Flip the ink cartridge cover open.
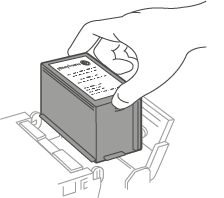
- Remove the ink cartridge.
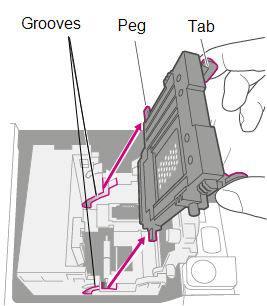
- Squeeze the two grey tabs on either side of the printhead.

- While squeezing, lift and tilt the printhead to the right. The printhead should come up out of the device.
- Unwrap the new printhead and remove the protective strip.

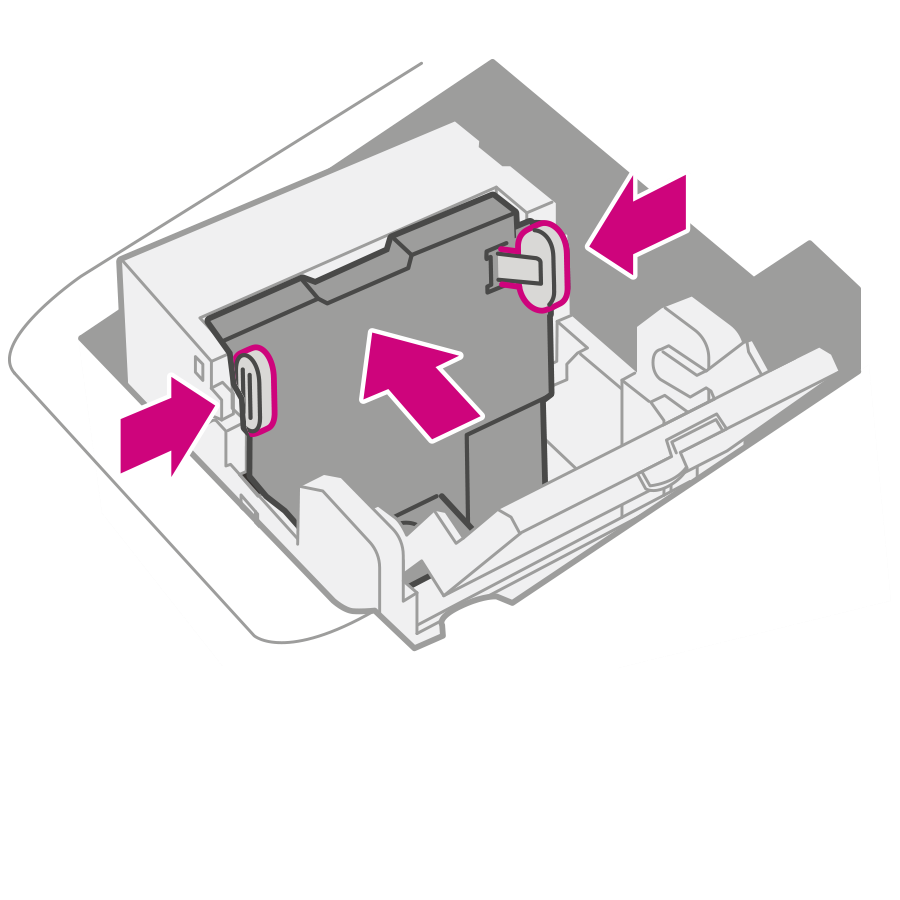
- Squeeze the tabs and slide the printhead pegs into the lower set of grooves.Warning: If you do not seat the printhead correctly it can damage the device.
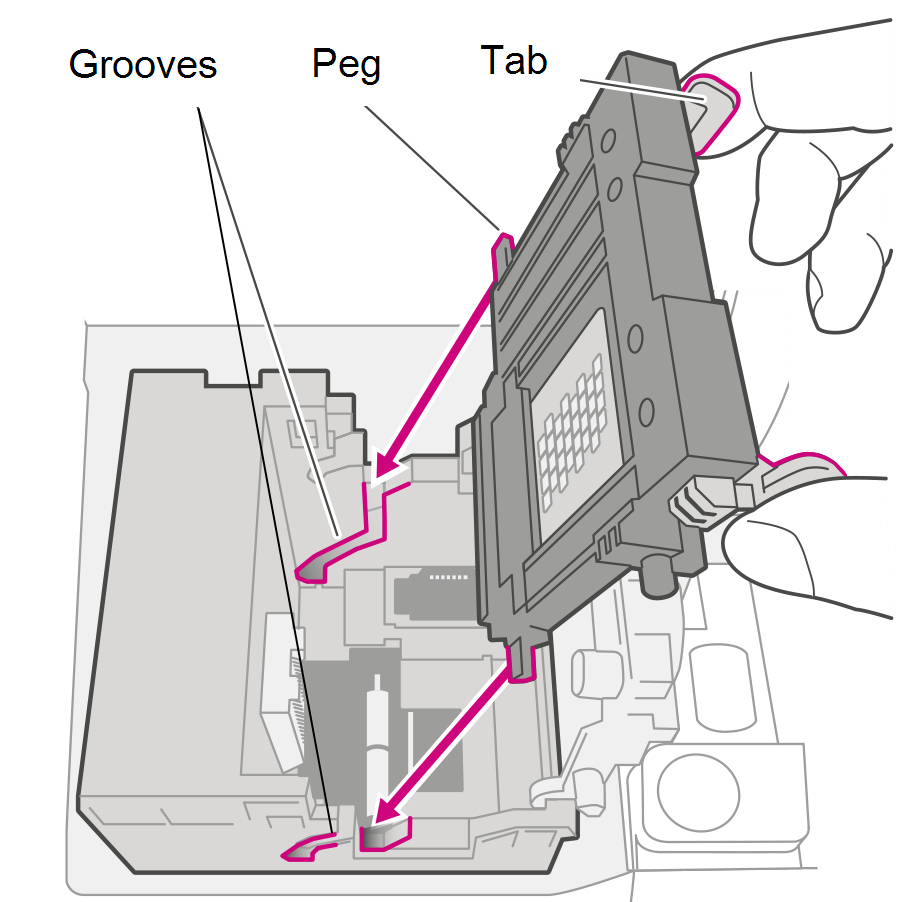
- Keep squeezing the tabs and push the printhead flush against the wall. The tabs will snap outward when placed correctly.
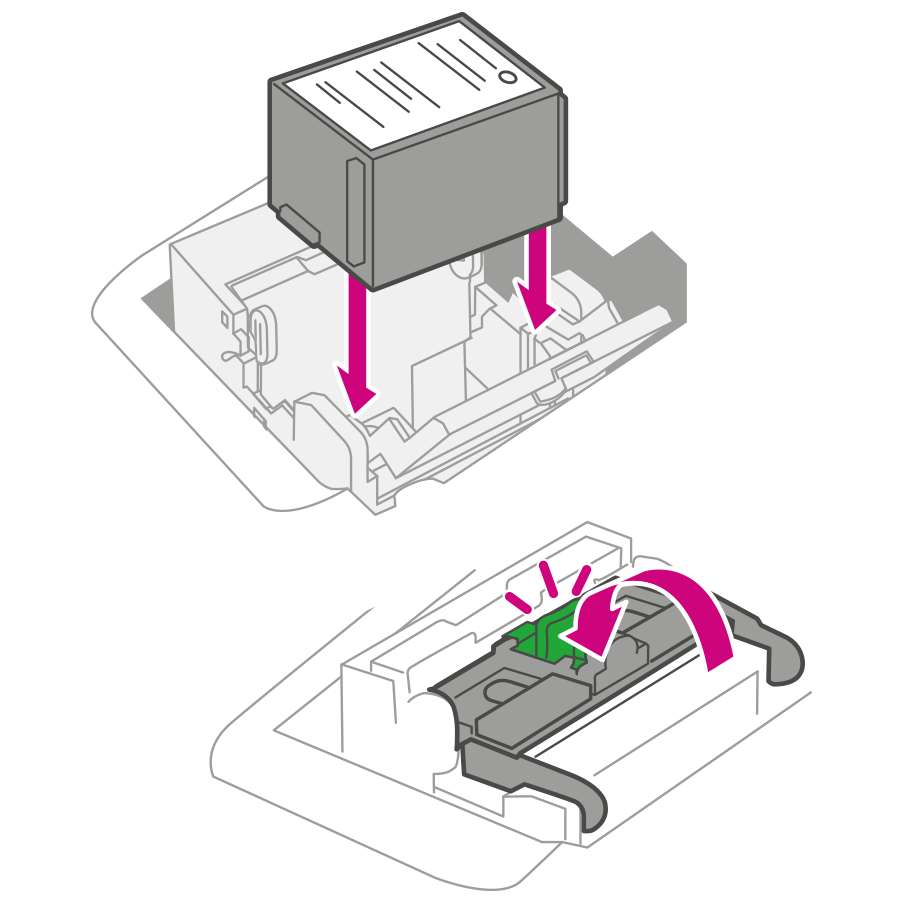
- Install the ink cartridge and close the guard.
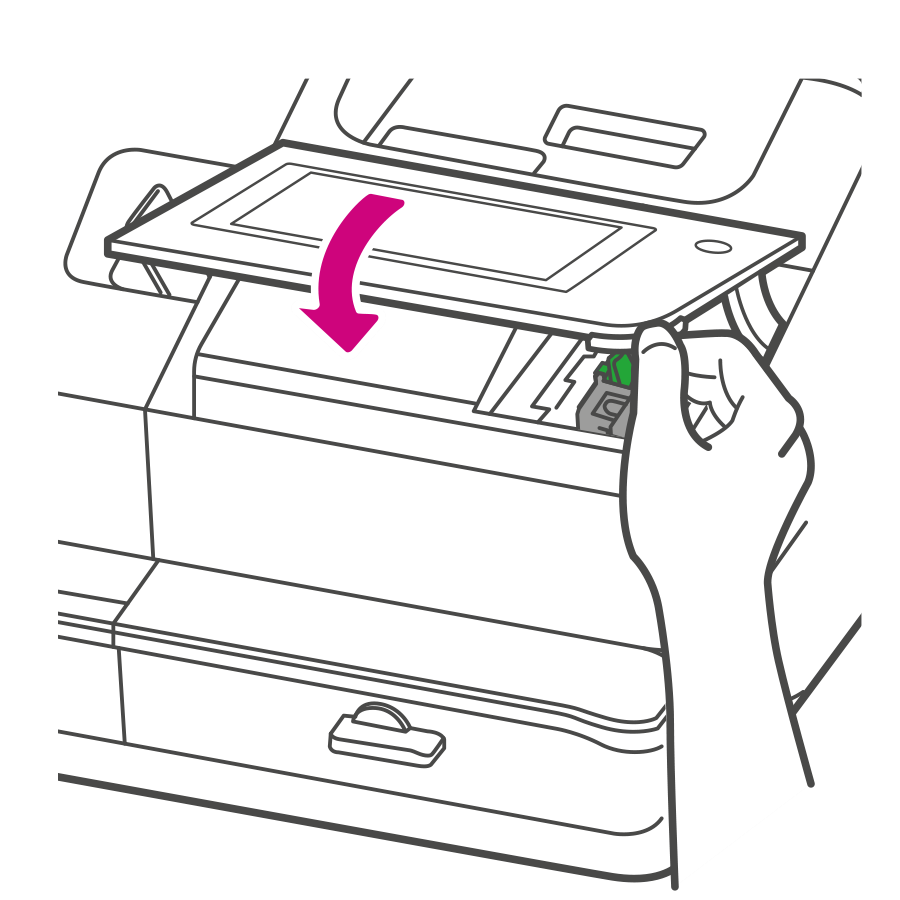
- Close the cover. The ink cartridge moves back to the original position.
- Tap Done.
- Print a print test pattern to be sure that your printhead is working properly.