
Printing a shipping label
Use Create Shipping Labels to get the best pricing, free tracking, and detailed delivery history for USPS package services. You can also send via UPS® or FedEx®. The packaging options and benefits are almost identical.
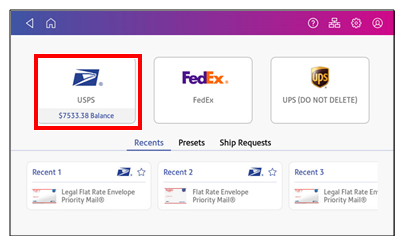
- Tap Create Shipping Labels on the Home screen.
- Tap the carrier you wish to use.
- Verify that the sender address is correct. If not, tap on the Sender field and select a new address.
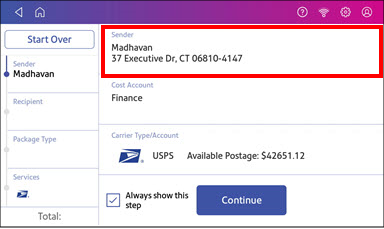
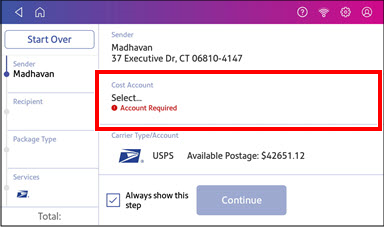
- Select an account if cost accounts are enabled. Verify the selected cost account. Tap Cost Account and select an account to change or add the account..
- Tap Continue.
- Enter the recipient address manually or tap Address book to select one from the address book.
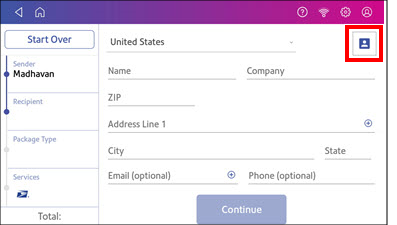
- Tap Continue.
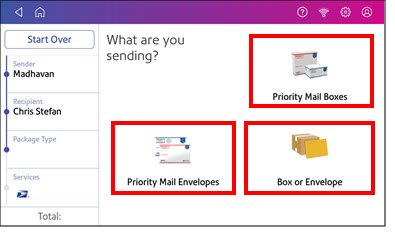
- Tap a package type.
- Enter the dimensions and weight of the package:
- Tap each dimension and enter a value. Tap the green check mark when done.
- If you have an attached scale, place the package on the scale and tap Weight. Tap Scale and the weight appears. Tap Apply.
- If you do not have a scale, tap Weight and enter the weight, then tap Apply.
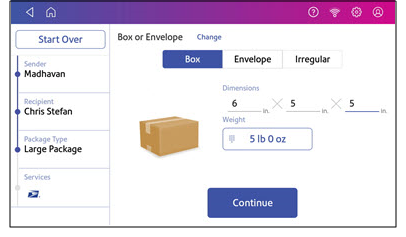
- Tap Continue.
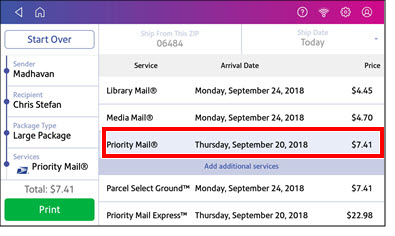
- Tap the service you wish to use.
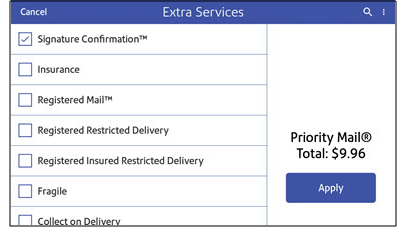
- To add additional services, tap Add additional services. If you are not adding any extra services, go to step 14.
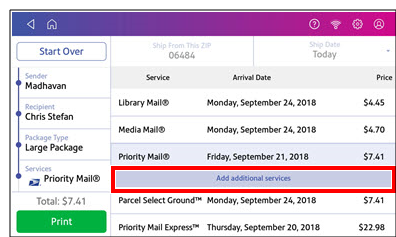
- Select the desired services and tap Apply.
- To print the label, tap Print.
- On the Label Options screen, tap Format and select the printer format.

- (Optional) Tap Print Sample to print a sample label.
- Tap Print again and the label prints.
- You may need to enter the Sender and Recipient's phone number, as it is required for some services.
- The carrier screen reappears.