Setting up a wired network connection
Use a network cable to connect your SendPro C, SendPro+ to the Pitney Bowes Data Center.
Step 1: Plug in your network cable
Plug one end of your network cable to your device and the other end to an internet jack on the wall or a router.
Step 2: Choose the connection type
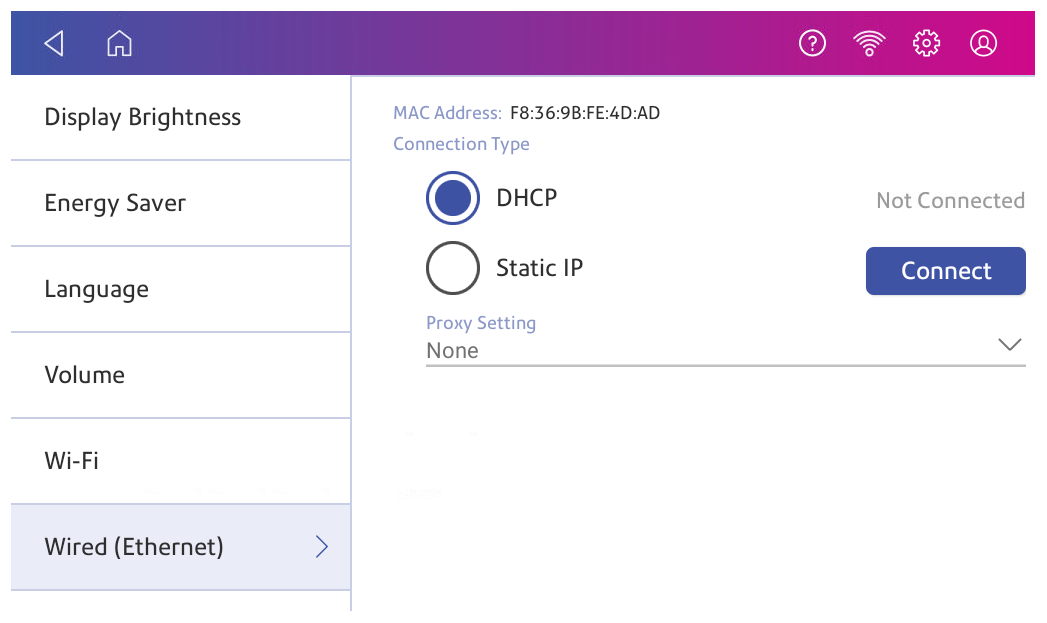
Select one of the two connection types supported for this device:
DHCP is the most common connection type. Choose DHCP if you are unsure which connection protocol to use or contact your IT department for advice.
DHCP
- Tap Settings.

- Tap Wired.
- Select DHCP.

- Tap Connect.
- If it does not connect, unplug the power cord.
- Wait 30 seconds. The screen should turn off after 10 seconds.
- Plug the power cord back in directly into a wall outlet.
- Quickly tap and release the power button to turn the device back on.
- Tap Settings.

- Tap Wired (Ethernet).
- Tap DHCP.
- Tap Connect.
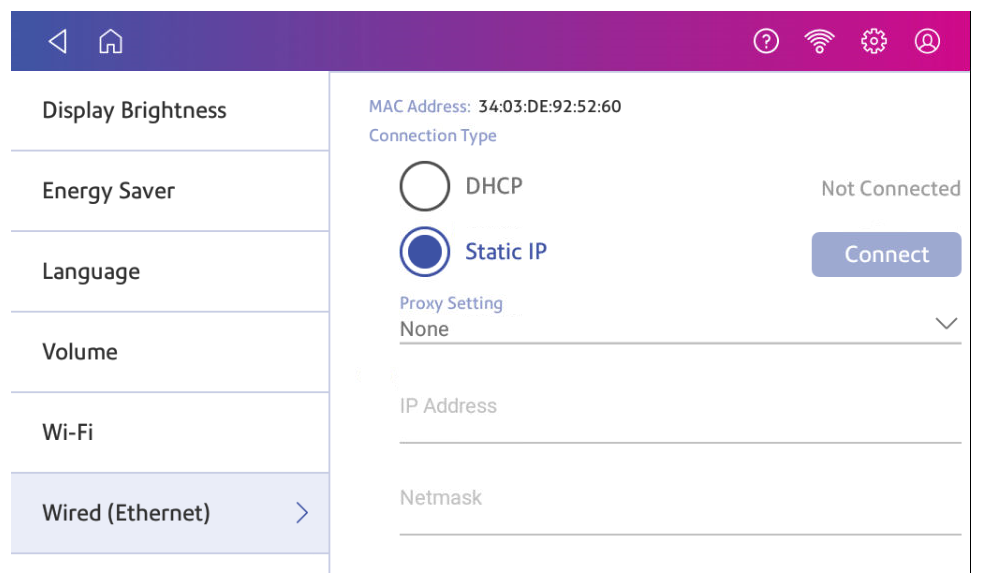
Static IP
- Tap Settings.

- Tap Wired.
- Select Static.

- Contact your IT department to obtain the settings you will need to enter for your device. The values needed are:
- IP Address
- Netmask
- Gateway
- DNS Address.
- Enter the settings you obtained in step 4 for the IP Address, Netmask, Gateway, and DNS Address in the corresponding fields.
- Tap Connect.
- If SendPro C, SendPro+ fails to connect, remove the network cable from the back of the device.
- Tap Connect. Wait for the attempted connection to fail.
- Plug the network cable back in.
- Delete the values in the IP Address, Netmask, Gateway, and DNS Address fields.
- Enter the IP Address, Netmask, Gateway, and DNS Address that you obtained in step 4.
- Tap Connect.
NOTE: If your device's model number is 8H00 or 9H00 it will remember the Static IP information even if you switch back to DHCP and then back again. This information includes IP Address, Netmask, Gateway and DNS Address as well as the proxy information.
